


Squarespace Shop Connector add-on for CS-Cart
Seamlessly integrate your vendor’s Shopify website with your CS-Cart marketplace
- Seamless Integration : Connects Squarespace with CS-Cart to ensure smooth data flow between the two systems.
- Product Importing : Automatically import products, including variants, options, descriptions, prices and images, from Squarespace to CS-Cart.
- Order Management : Transfers orders from CS-Cart to Squarespace for efficient processing and management, including order status updates.
- Inventory Management : No inventory sync with CS-Cart.
- Data Mapping : Allows mapping of product’s tags from Squarespace’s with CS-Cart categories to ensure compatibility between Squarespace and CS-Cart data structures.
- Shipment Creation at CS-Cart : Generate shipment with tracking number at CS-Cart.
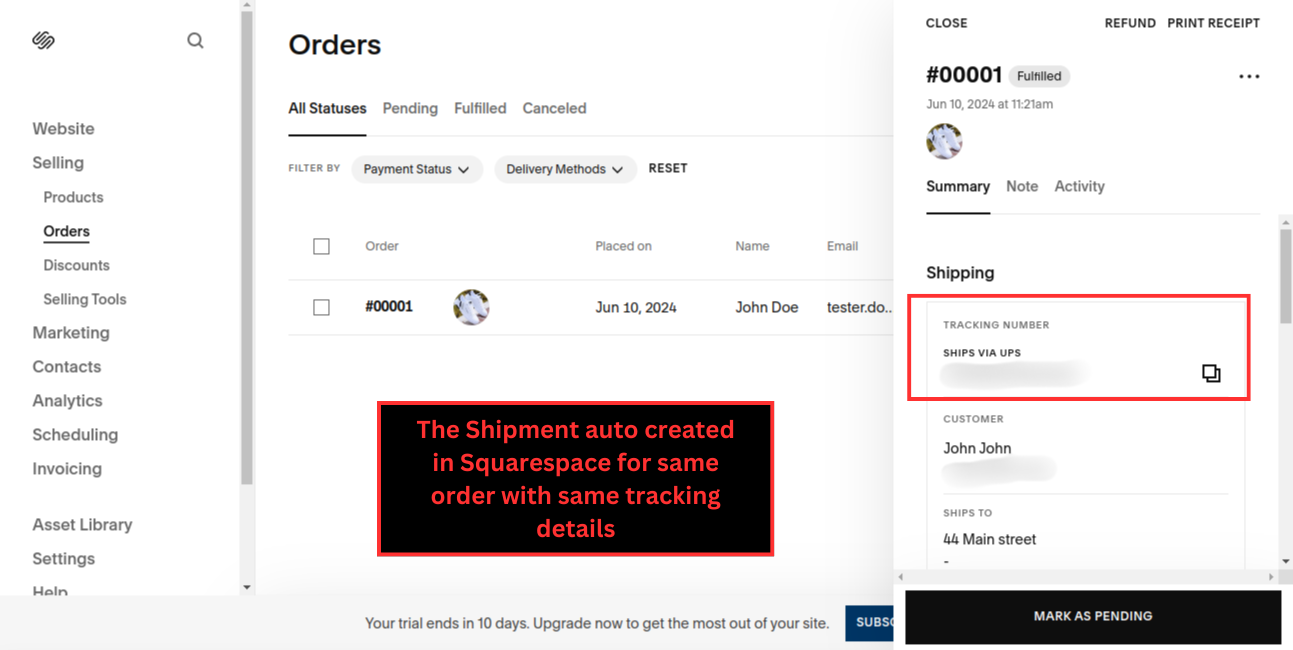
- Synchronized Shipment Tracking : The same shipment with the identical tracking number is automatically placed in Squarespace (One way Shipment Sync).
- The add-on simplifies admin tasks by automating product synchronization from Squarespace to CS-Cart , ensuring efficient management and accurate data flow.
- The add-on provides customers with a seamless shopping experience by ensuring up-to-date product information and synchronized order processing across Squarespace and CS-Cart.
Why our Squarespace add-on is the ultimate choice for E-commerce Enhancement?
- Hassle-Free Integration: This add-on ensures a smooth and hassle-free integration process, allowing you to quickly and effortlessly connect your CS-Cart store with the Squarespace add-on.
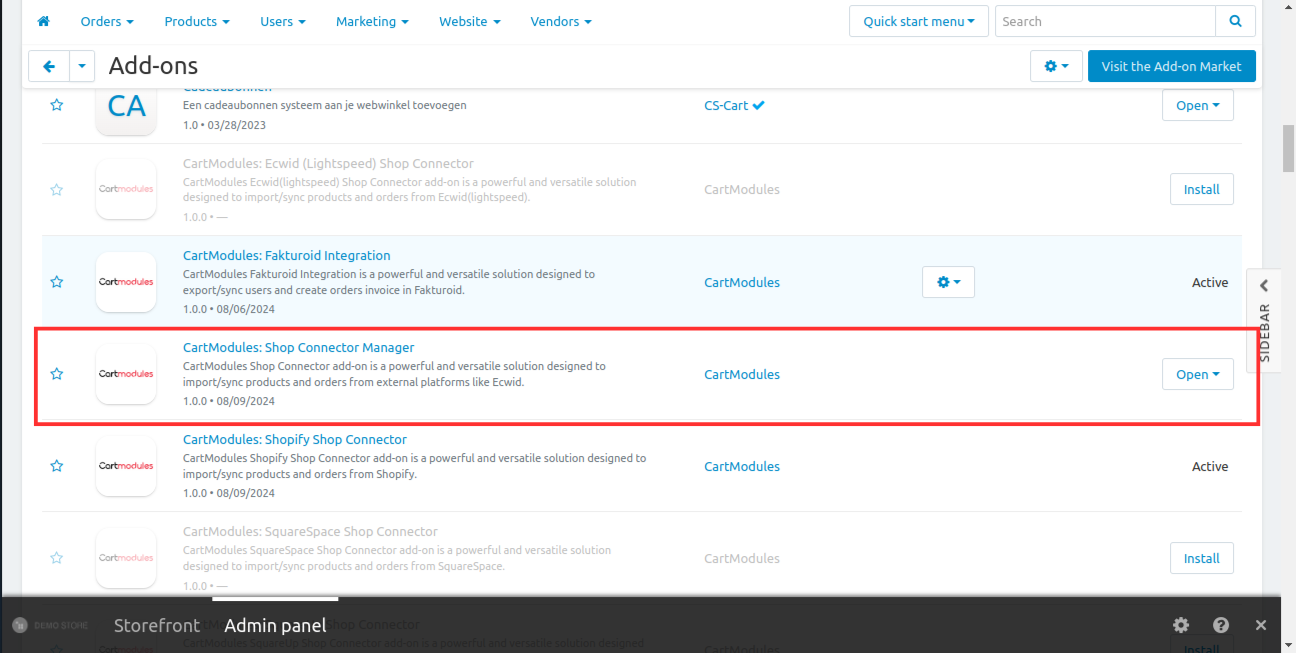
Note : The Shop Connector Manager should be purchased and installed before SquareSpaceShop Connector to make this functioning well.
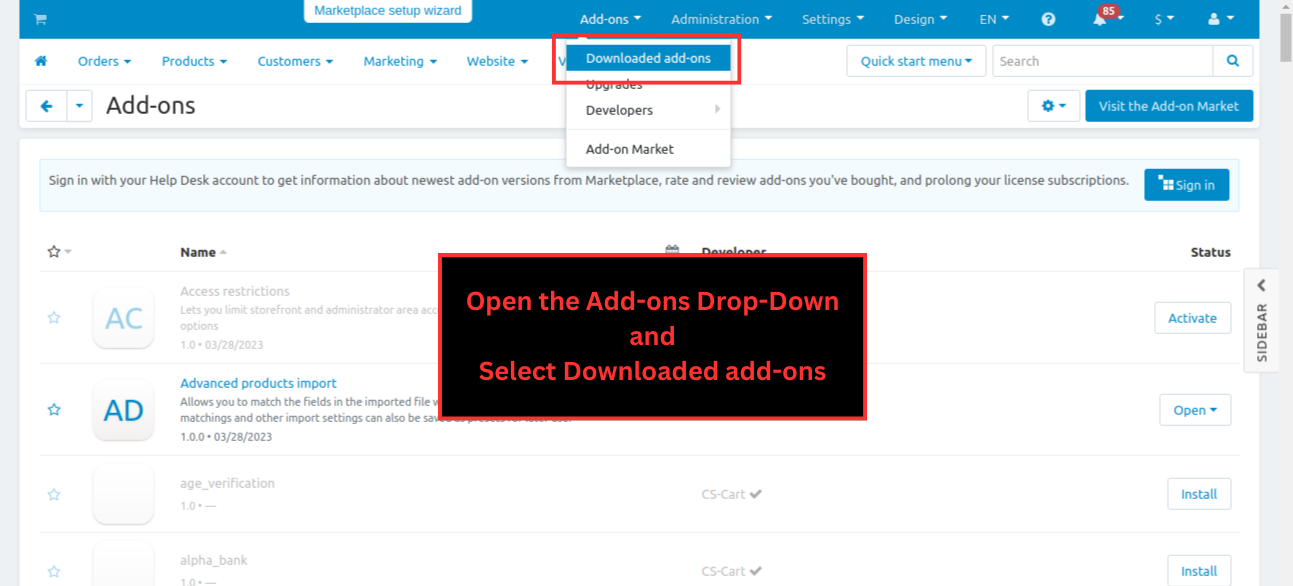
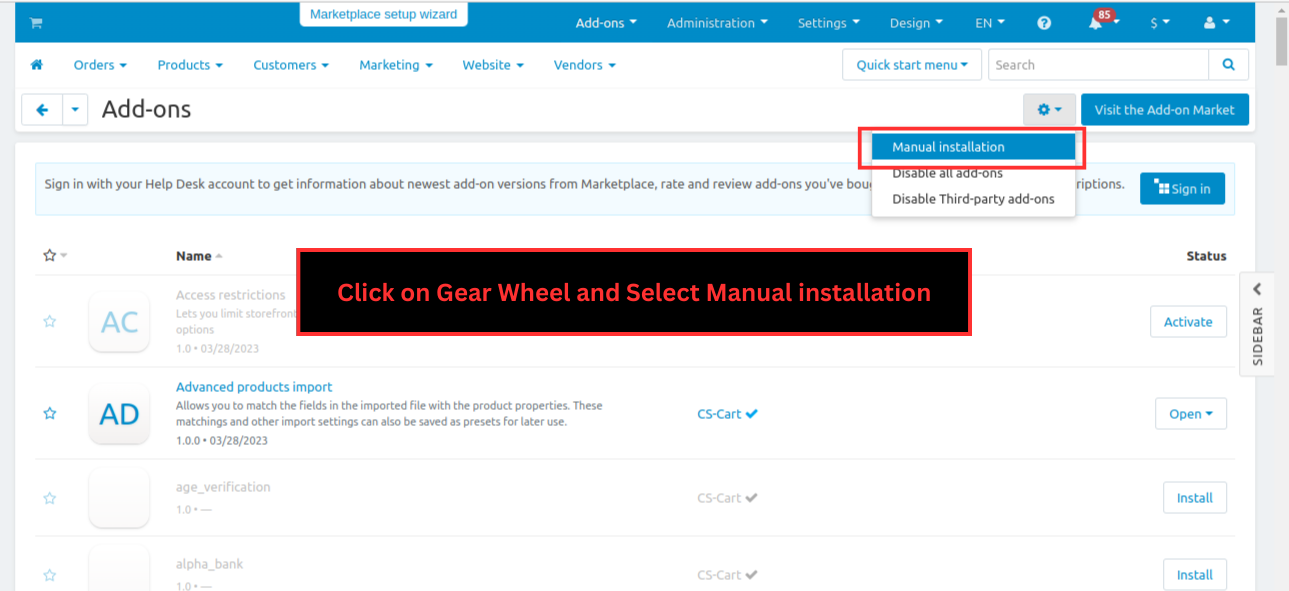
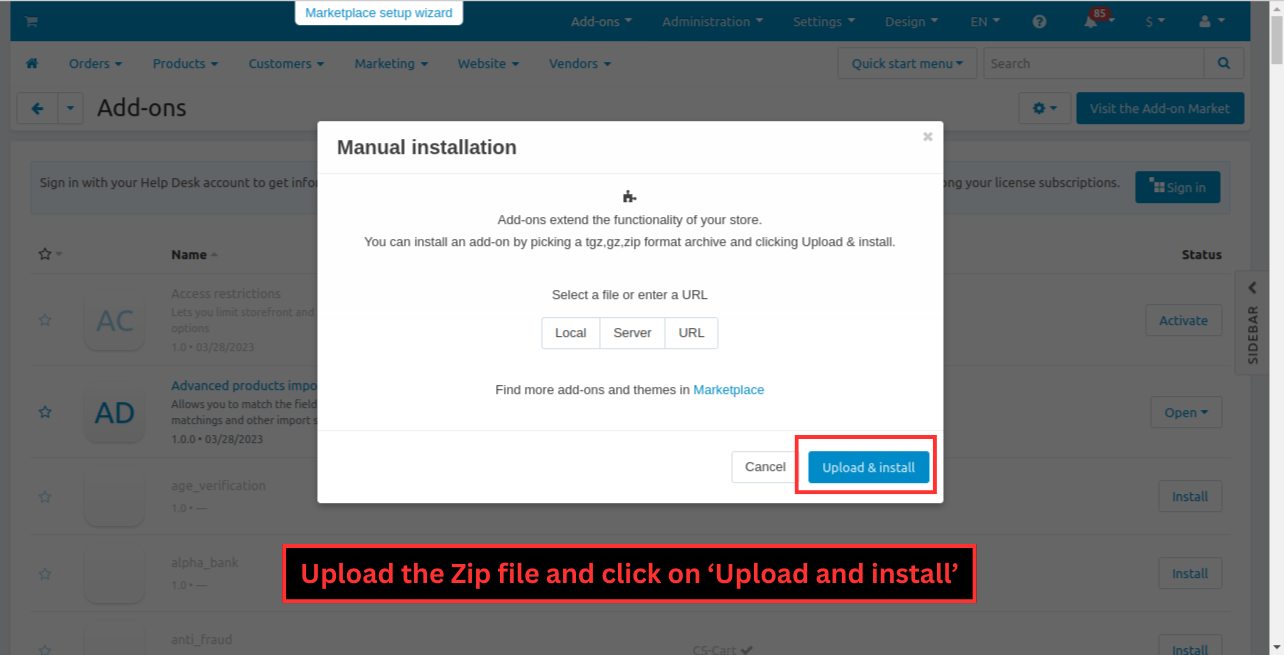
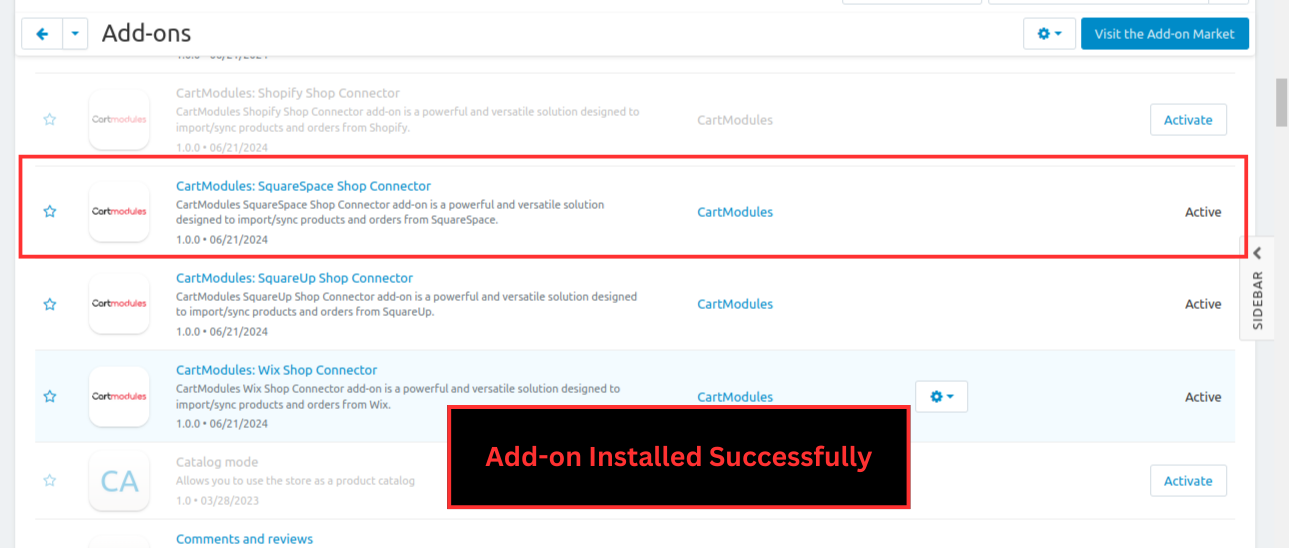
Add-on Installation Steps
Step 1 : Open the Add-ons drop-down and select ‘downloaded add-on’

Step 2 : Click on gear wheel and select ‘Manual installation’

Step 3 : Upload the zip file and click ‘Upload and install’

The add-on installed successfully


Note : The Shop Connector Manager should be purchased and installed before Shopify Shop Connector to make the Shopify Shop Connector functioning well.
Steps to follow for successful integration :
Steps to test Squarespace integration:-
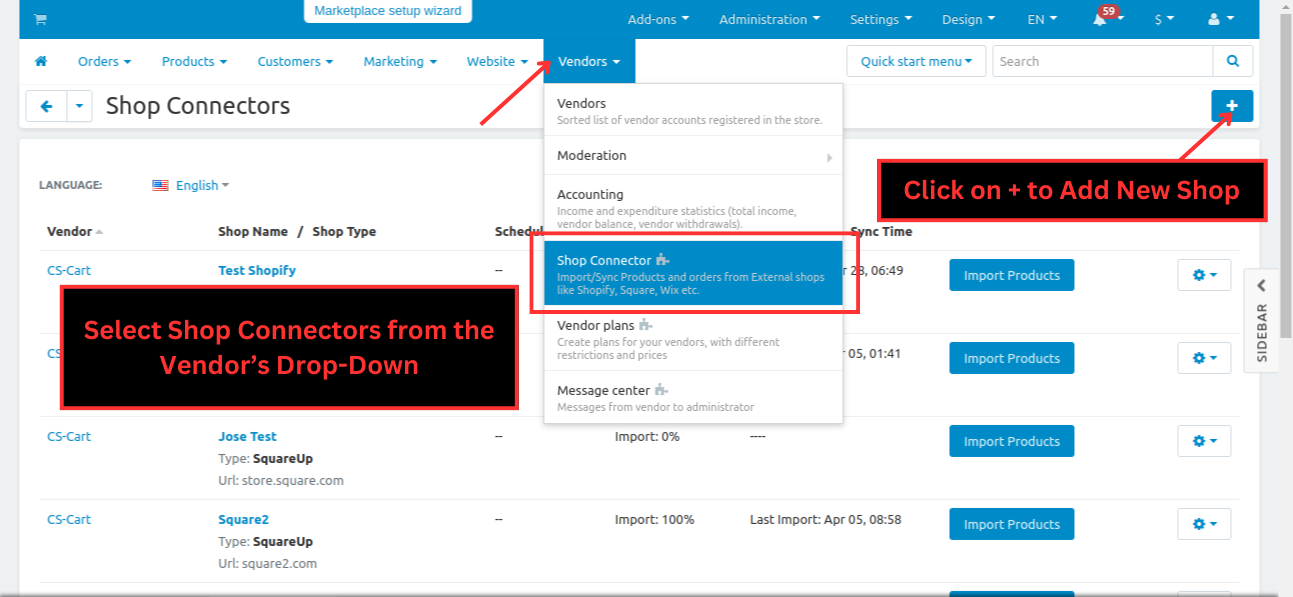
Step 1 : At CS-Cart , Select Shop-Connectors from the Vendors Drop-Down and Click on ‘+’ to add new shop
%201.png?1724756188144)
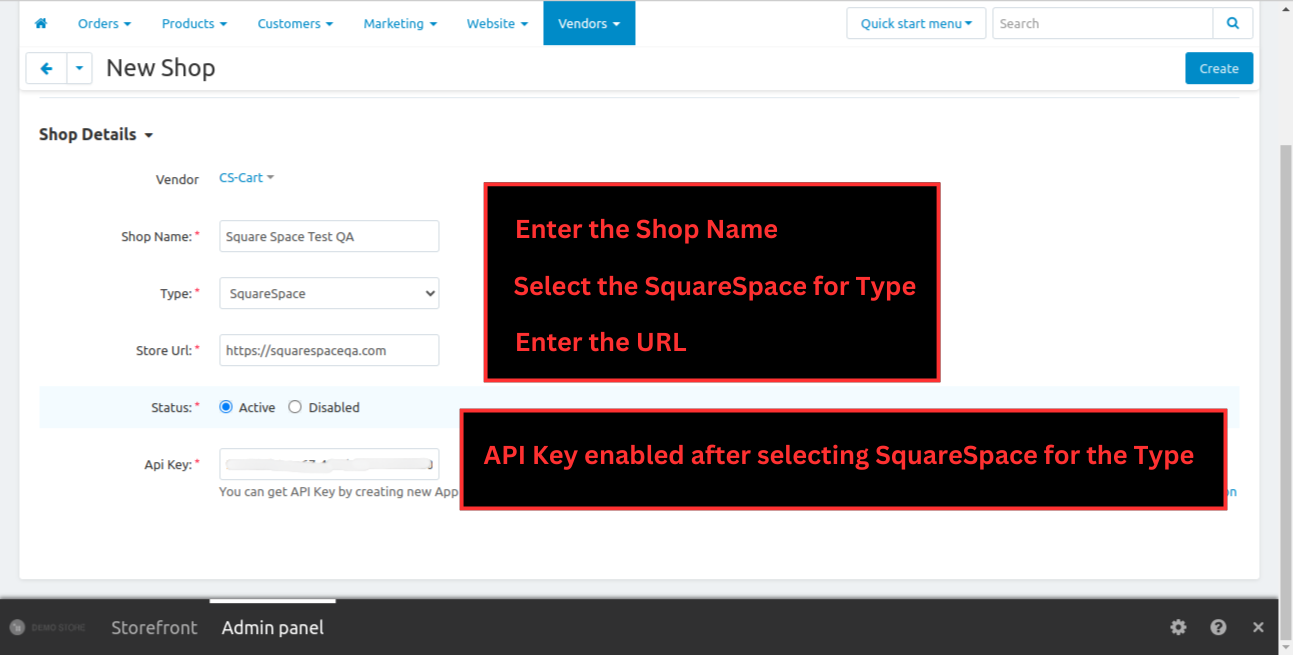
Step 2 : Enter the Shop Name , Select the SquareSpace for Type , Enter the URL
%202.png?1724756199613)
Note : Paste the API Key copied & Click on Create button
Note : The steps to create an API Key successfully is present at the end of document
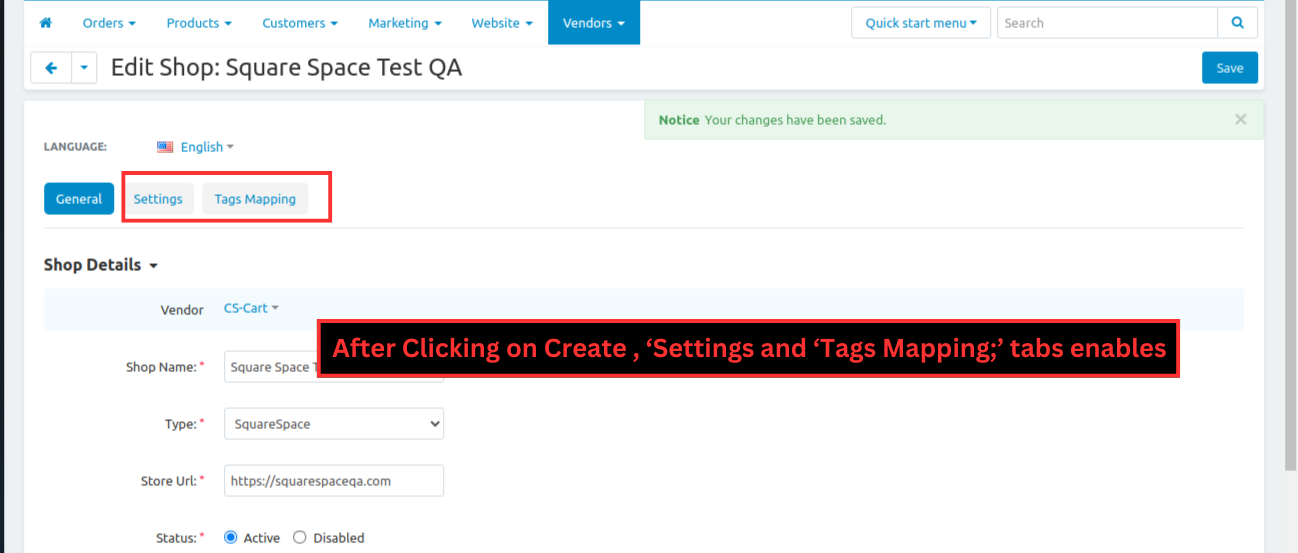
Step 3 : After clicking on create, the ‘Settings’ and ‘Tags Mapping’ tabs enabled
%203.png?1724756212853)
Assign Tags to Product at Squarespace

Note : These created tags are listed under ‘Tags Mapping’ tab of the shop after importing
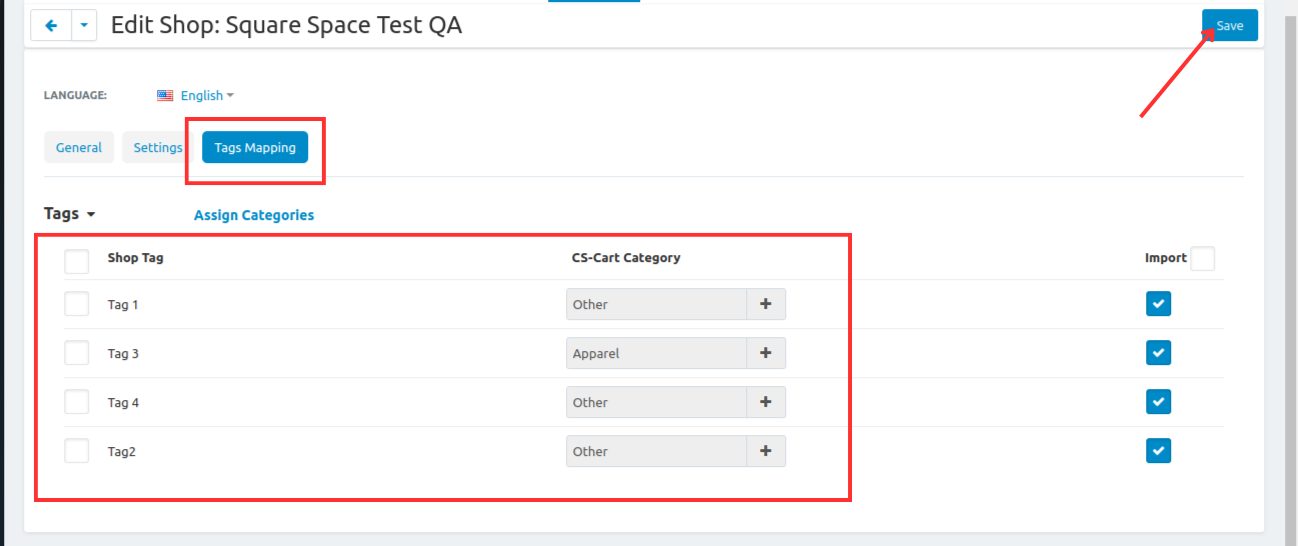
Step 4 : Select Tags Mapping and map Squarespace product tags with CS-Cart and Click on Save
%204.png?1724756283771)
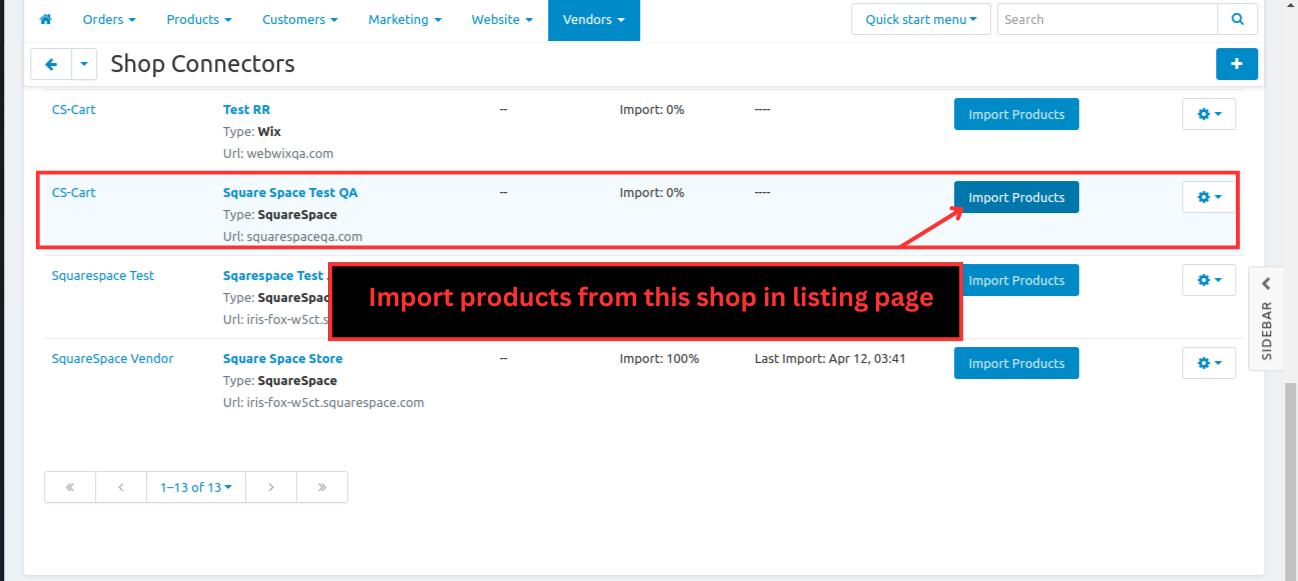
Step 5 : Import products from this shop in listing page of shop connectors
%205.png?1724756478507)
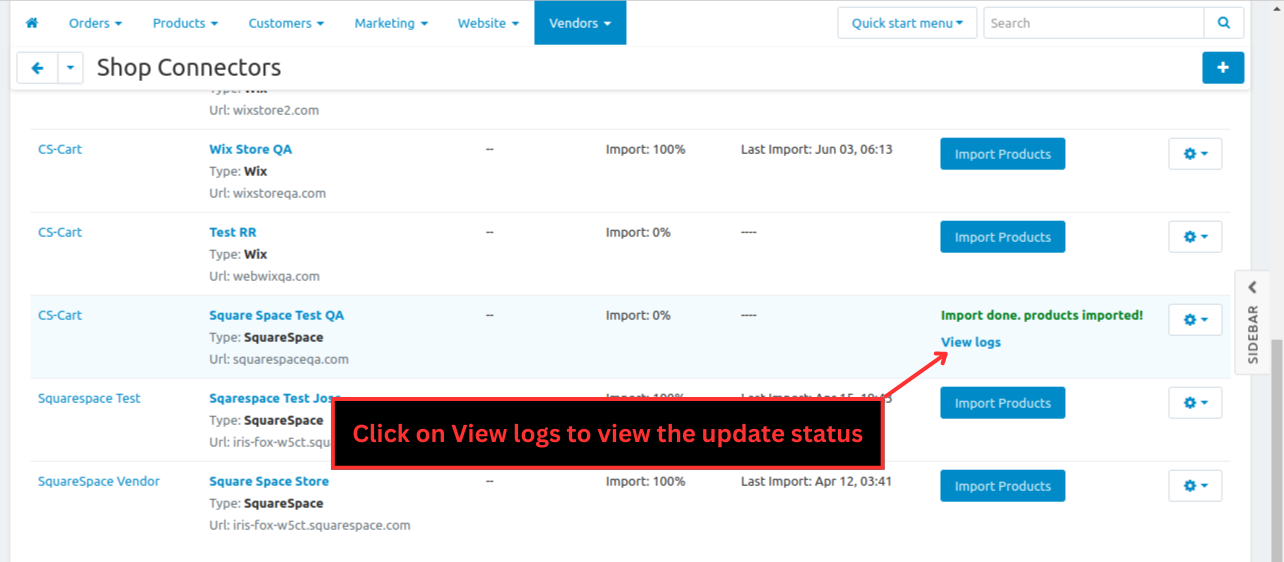
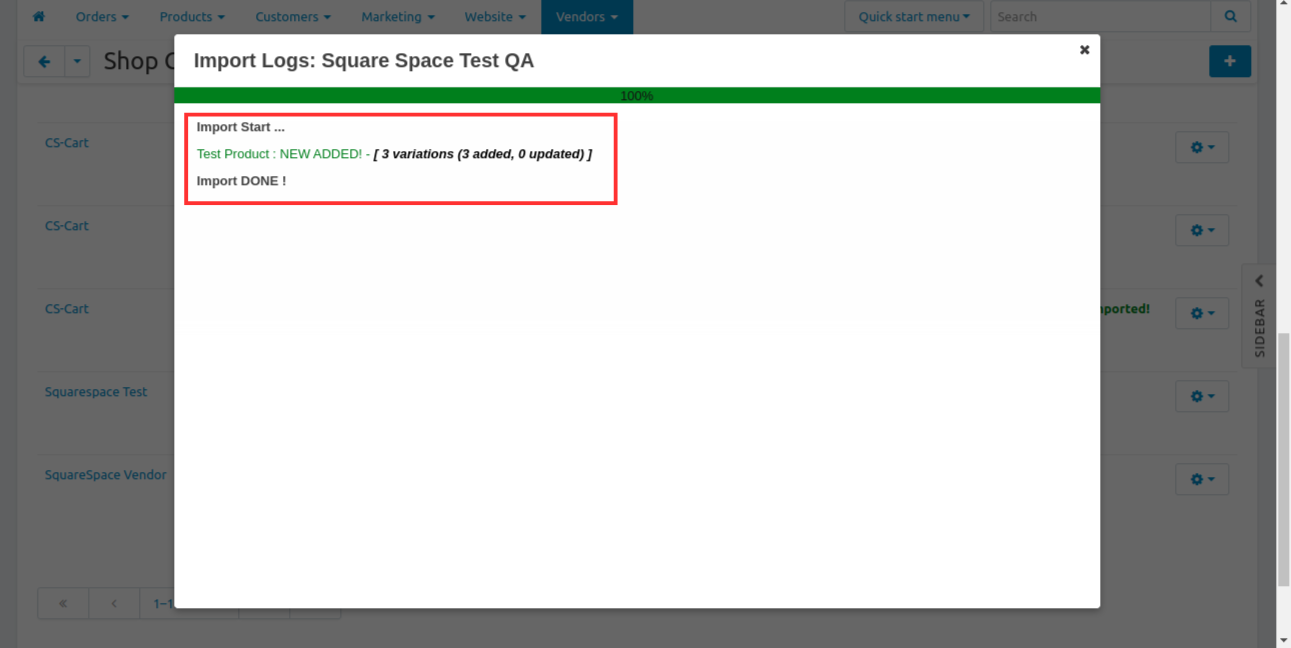
Once the importing is done , Click on View logs to view the update status
%206.png?1724756501466)
%207.png?1724756519088)
Step 6 : Now the imported products are listed in Products -> Products
%208.png?1724756557987)
Step 7 : Here , the imported products are listed and Change the status from disabled to active
%209.png?1724756704727)
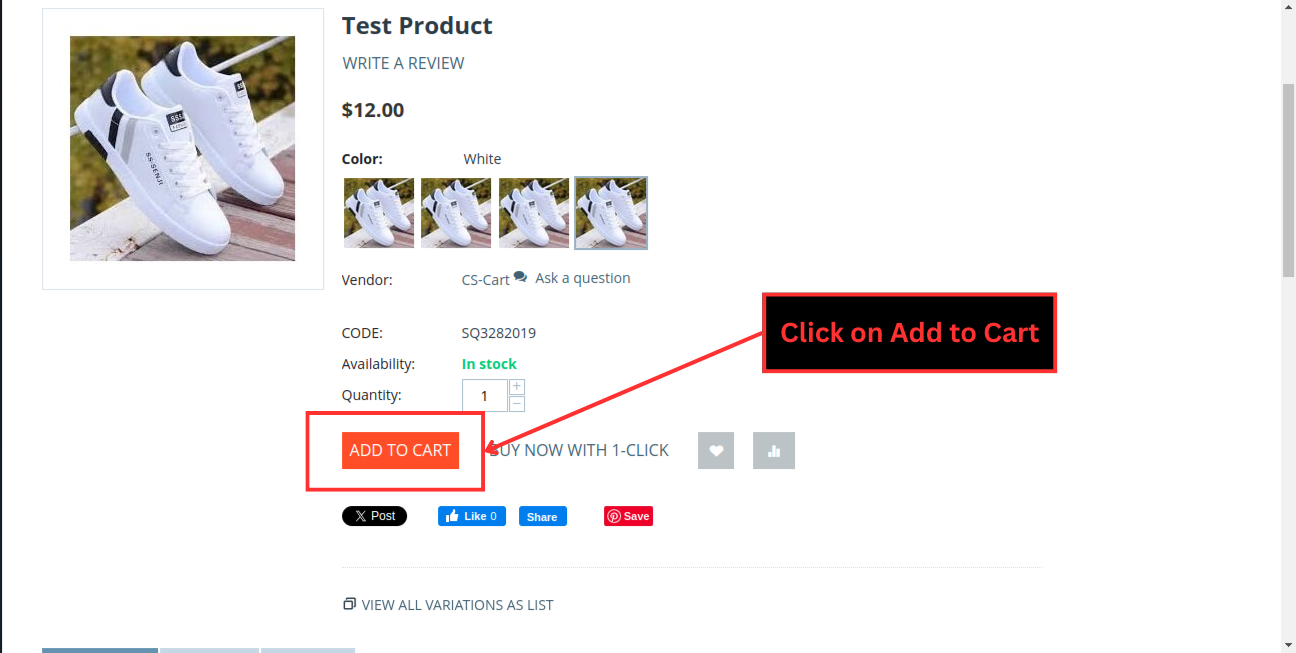
Step 8 : Now , Open the product at front end and Click ‘Add to Cart’ proceeding to checkout
%201.png?1724756727989)
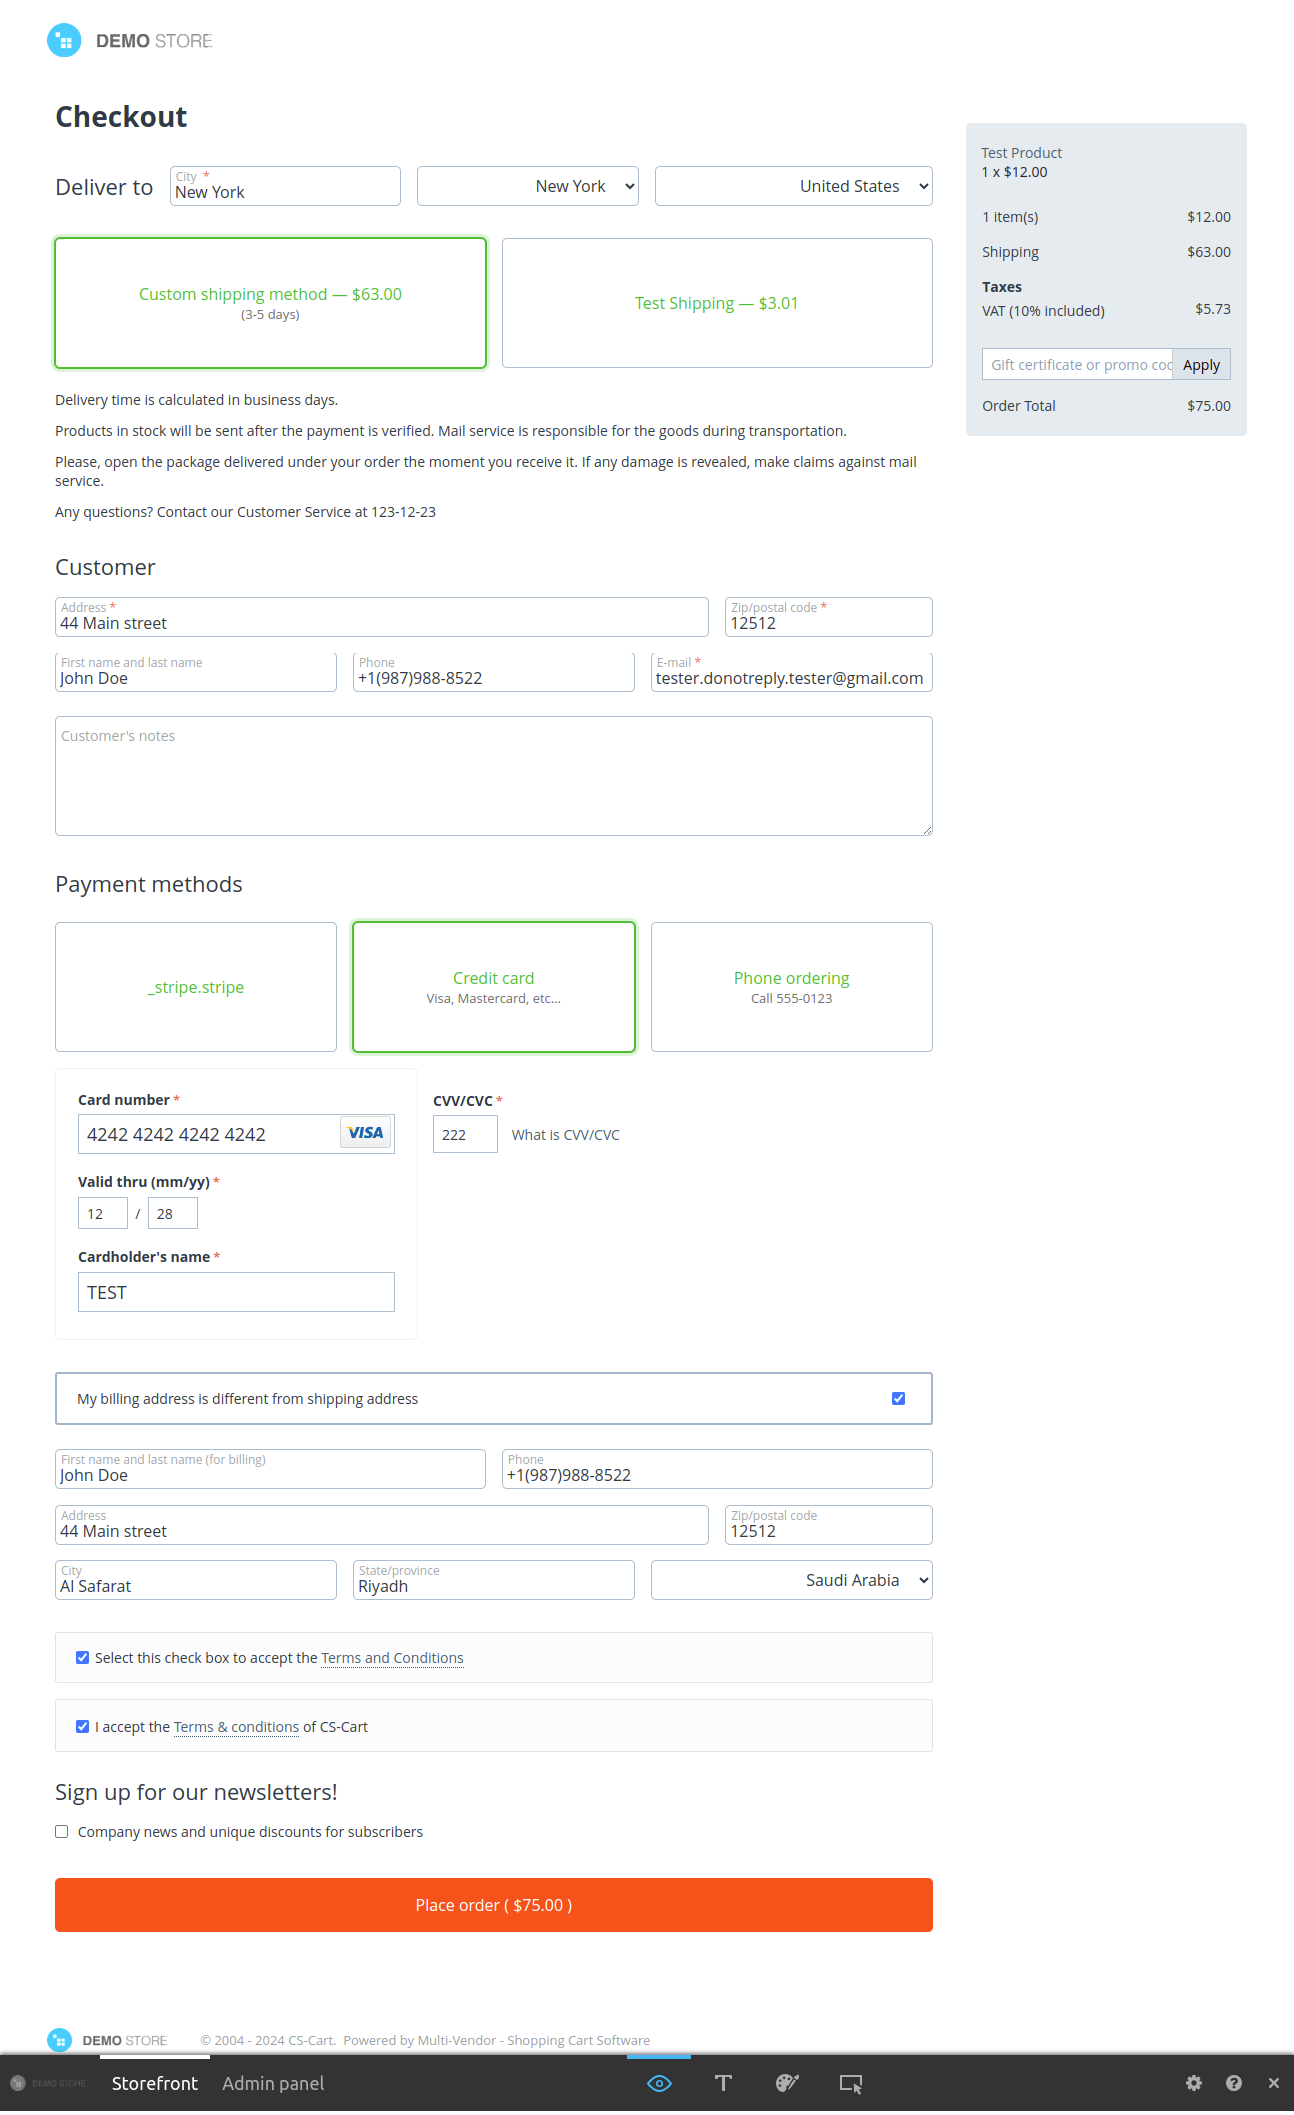
Enter the required details at checkout page and Click on Place Order
%202.png?1724756750755)
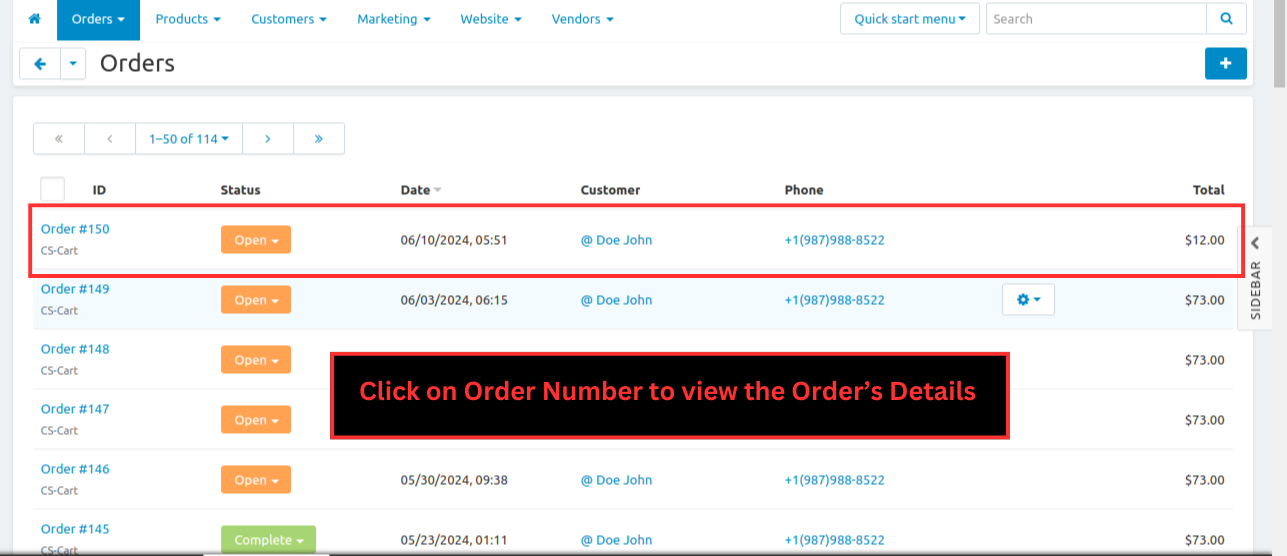
Step 9 : At admin panel , Select Orders -> View orders
%2010.png?1724756763214)
Step 10 : Click on Order Number to view the Order’s Details
%2011.png?1724756883250)
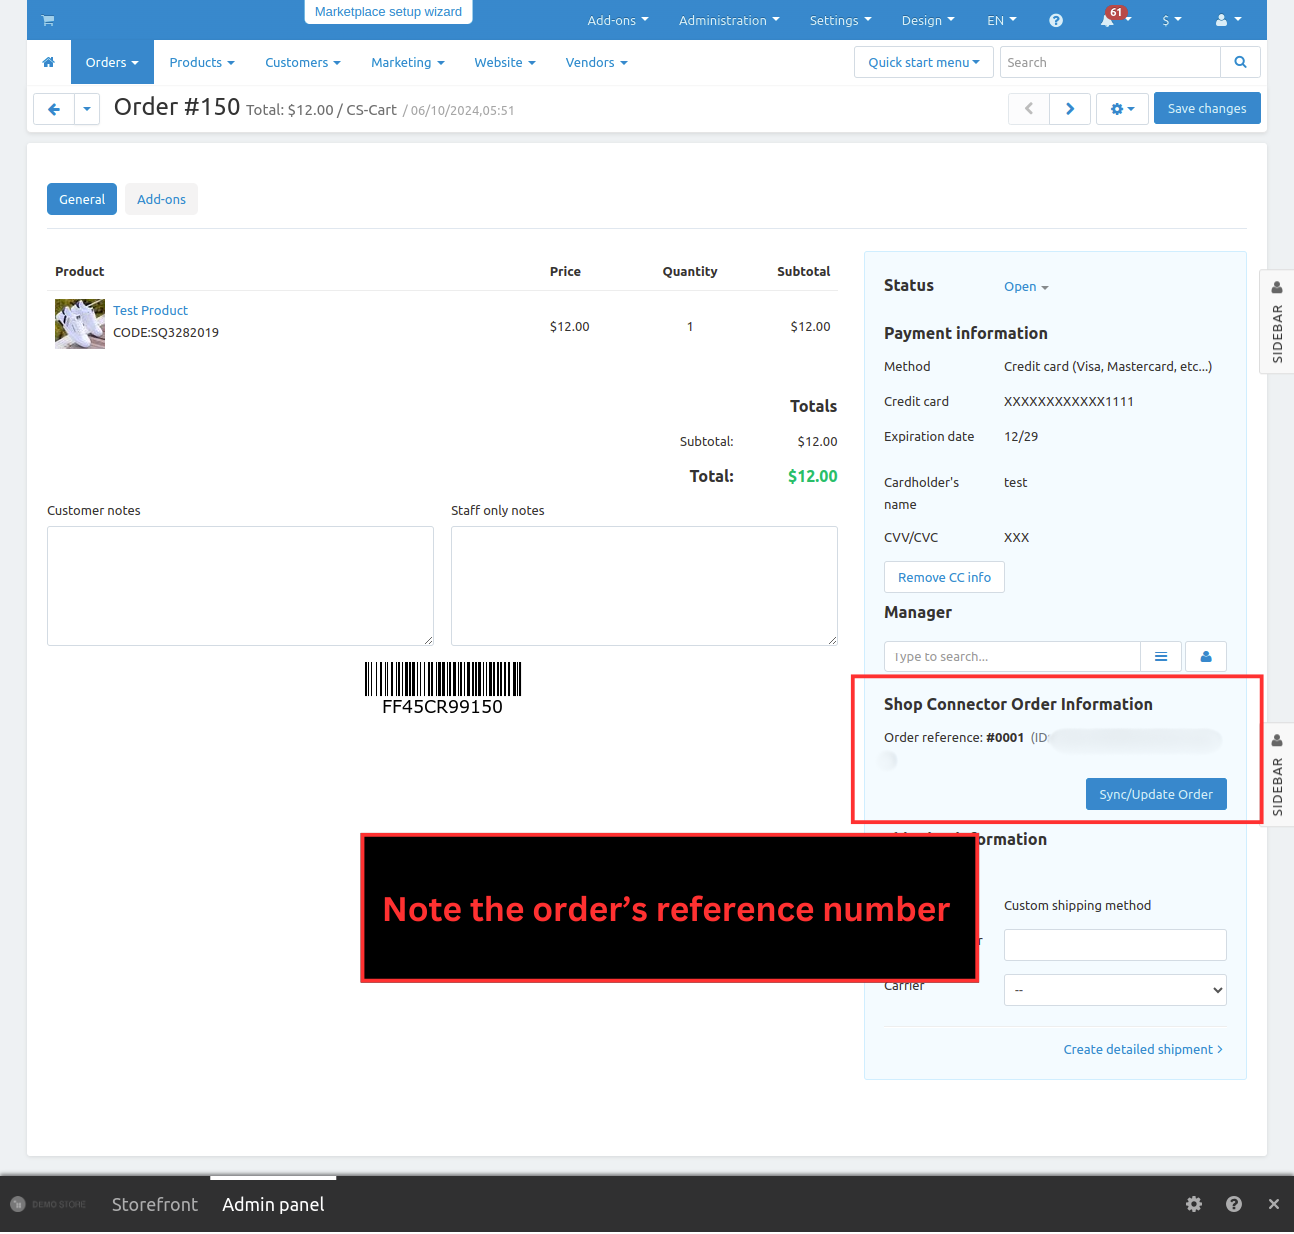
Step 11 : Note the order’s reference number from the Order’s Detail’s Shop Connector order information
%2012.png?1724756899319)
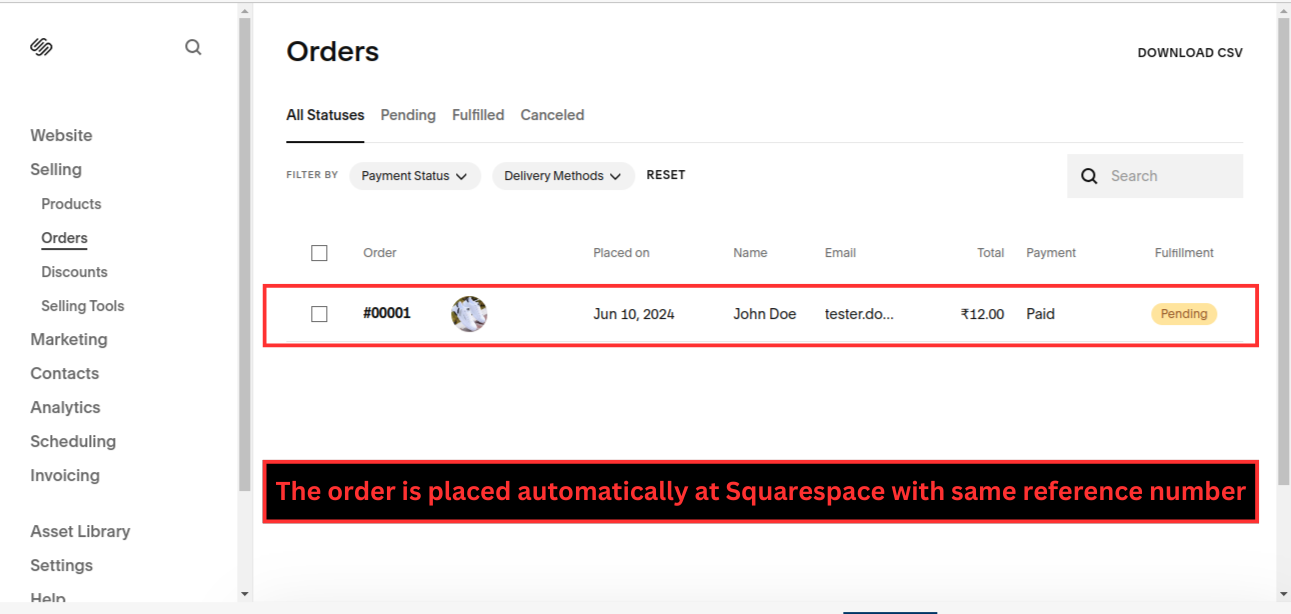
Step 12 : Now open the Squarespace Website and Select Orders from Selling

The order is placed automatically at Squarespace with same reference number

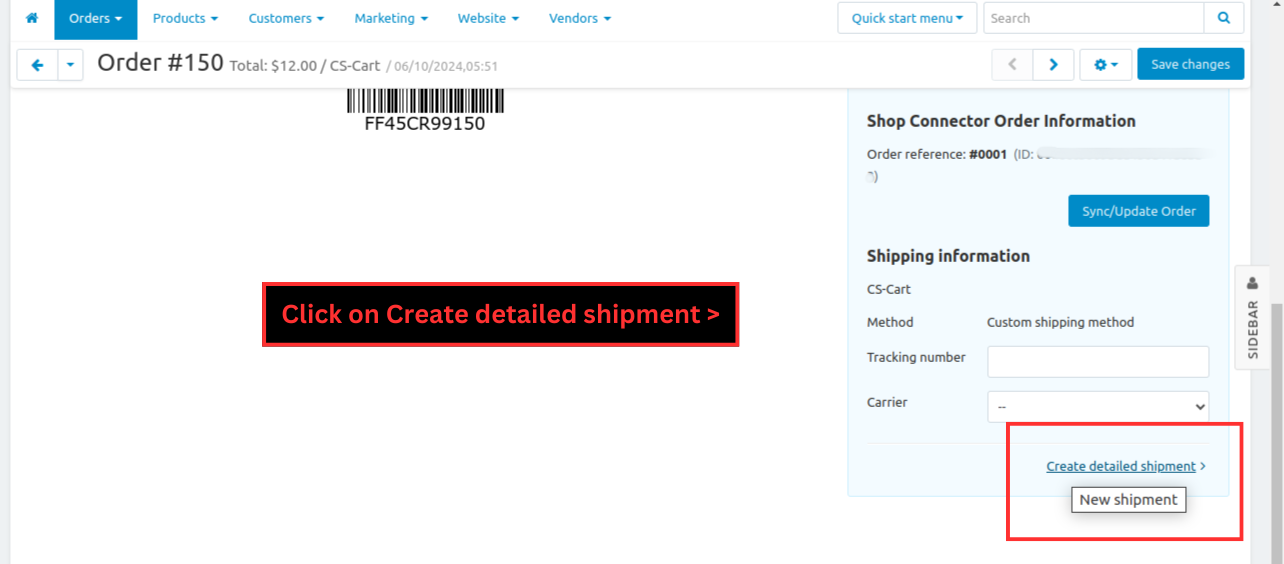
Step 13 : Create a new Shipment at CS-Cart after clicking on ‘Create detailed shipment >’
%2013.png?1724757299359)
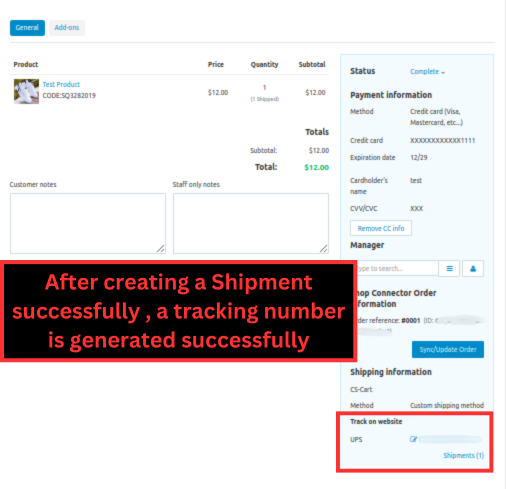
Step 14 : After creating a Shipment successfully , a tracking number is generated successfully
%2014.png?1724757076442)
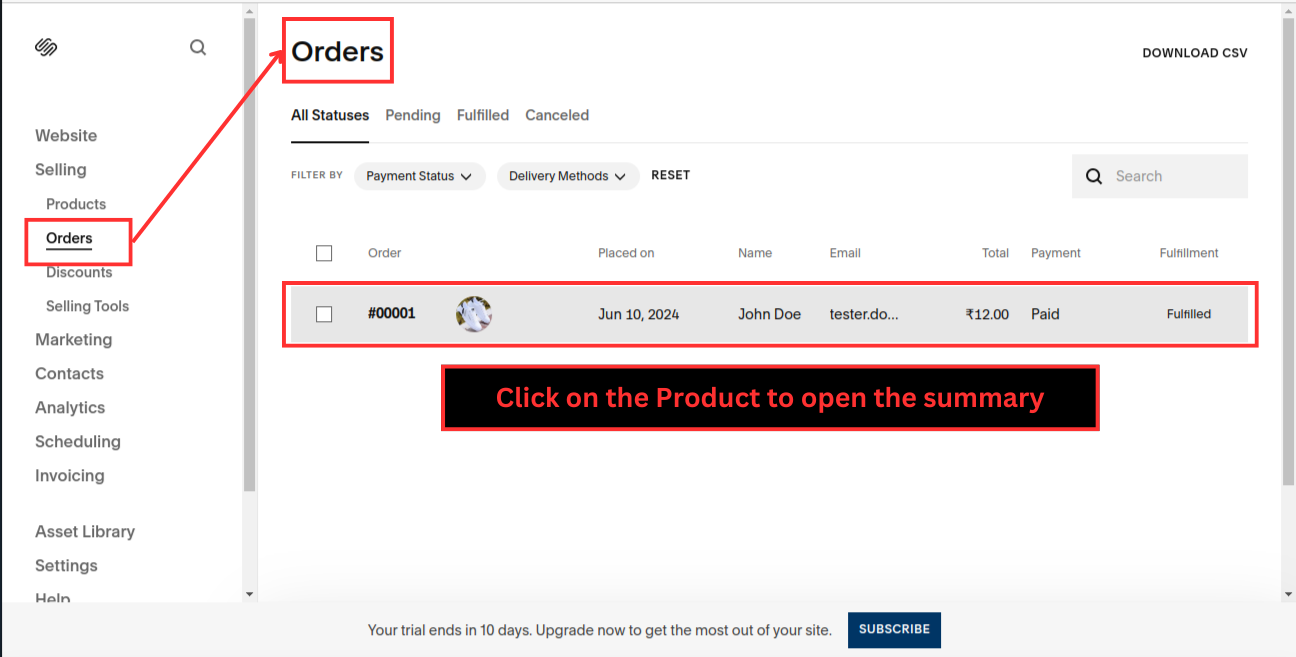
The Shipment auto created in Squarespace for same order with same tracking details.

- Transparent payment process : This Squarespace offers a straightforward and transparent payment process , integrating with major payment processors like Stripe and Paypal.
- Easy to access : Squaespace provides an intuitive interface that is easy for users to navigate and manage their websites , including the payment and e-commerce functionality.
- Works for test and live account : Squarespace allows you to set up both test and live accounts for payment processing through its integration with Stripe , enabling you to test transactions before going live.
Sqaurespace has 2 limitations/issues:
1. Squarespace does not have an API to retrieve product categories . The only option is to get tags from Squarespace products via the API and then map these tags to categories in CS-Cart for importing.
2. Squarespace lacks a webhook / event for product and inventory synchronization. This means you cannot automatically sync product and inventory updates in real time.
Using this add-on , you can significantly enhance your website’s functionality, aesthetics and user engagement.
Whether you are looking to integrate advanced e-commerce features , improve SEO , streamline your content management or customize your site’s design , this add-on provides the tools and flexibility you need.
By leveraging these additional capabilities , you can create a more dynamic and effective online presence , ultimately driving higher traffic , better customer satisfaction and increased business growth.
Embrace the full potential of your Squarespace site with this powerful add-on and watch your digital footprint thrive.
Steps to create API key in Squarespace:-
Step 1 : Log in to ‘https://iris-fox-w5ct.squarespace.com/’ and create a website successfully

Step 2 : The Website Created Successfully and Listed at the dashboard

Step 3 : Click on the Website to open the Website

Step 4 : Click on Settings menu at the left once the site opens up

Step 5 : In Settings popup, select 'Developer Tools' menu on left and then click on 'Developer API Keys'

Step 6 : In Developer API Keys , Click on ‘Generate Key’ button

Step 7 : Now , Enter the Key Name and Select Products , Inventory and Orders with Read/Write and Click on Generate Key at the top

Step 8 : API key generated successfully : Copy the API Key and keep it

Note : After closing pop-up you can not retrieve/find this API Key